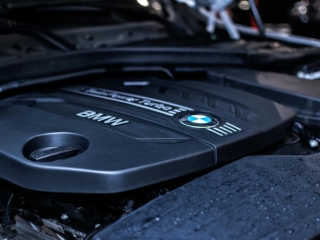
Changing a car engine, also known as an engine swap, is a complex process that requires mechanical knowledge, proper tools, and planning. Here are the most important steps involved in changing a car engine:
1. Preparation and Planning
- Research Compatibility: Ensure the replacement engine is compatible with your car model in terms of size, mounts, and wiring.
- Gather Tools and Equipment: You’ll need an engine hoist, basic tools (sockets, wrenches, etc.), safety equipment, and any necessary engine-specific parts like new gaskets, fluids, etc.
- Work Environment: Set up a safe, well-lit, and ventilated space with enough room to maneuver large components. Ensure you have proper safety gear (gloves, eye protection, etc.).
2. Disconnect the Battery
- Safety First: Disconnect the negative terminal of the car’s battery to prevent electrical shorts or injuries.
3. Drain Fluids
- Engine Oil, Coolant, Transmission Fluid: Drain all engine fluids, including oil, coolant, and any transmission fluid, to prevent spillage during engine removal.
4. Disconnect Components and Wiring
- Wiring Harness: Label and disconnect all electrical connections to the engine, including sensors, ignition, and fuel injectors.
- Fuel Lines: Disconnect the fuel lines, being careful to release any pressure in the system.
- Exhaust System: Unbolt the exhaust manifold or catalytic converter, depending on your vehicle’s design.
- Hoses and Cables: Disconnect radiator hoses, throttle cable, and any vacuum lines.
5. Remove Ancillary Parts
- Radiator and Fans: Remove the radiator, cooling fans, and possibly the air conditioning condenser if they obstruct access.
- Engine Accessories: Remove parts like the alternator, power steering pump, and air conditioning compressor. Some may be reattached to the new engine.
6. Unbolt the Transmission
- Transmission Mounts: Unbolt the transmission from the engine. For manual transmissions, you’ll also need to remove the clutch.
- Crossmember (if applicable): Remove any crossmembers or mounts connecting the transmission to the frame.
7. Remove Engine Mounts
- Support the Engine: Attach the engine hoist to the engine securely using chains or lifting straps.
- Unbolt Engine Mounts: Carefully unbolt the engine mounts that secure the engine to the chassis.
8. Lift the Engine Out
- Hoist the Engine: Use the engine hoist to slowly and carefully lift the engine out of the car, ensuring nothing is caught or snagged.
- Clearance Check: Ensure that there’s enough clearance around the engine bay to lift the engine without damaging surrounding components.
9. Prepare the Engine Bay
- Clean and Inspect: Clean the engine bay and inspect for any damage or parts that need to be replaced before installing the new engine.
- Replace Parts (if necessary): Replace mounts, hoses, or wiring harnesses if they are worn or damaged.
10. Install the New Engine
- Positioning: Lower the new engine into the engine bay slowly, aligning it with the engine mounts and transmission.
- Reconnect Engine Mounts: Bolt the new engine securely to the engine mounts.
- Reattach Transmission: Bolt the transmission to the engine, ensuring proper alignment of the input shaft and bell housing.
11. Reinstall Components and Wiring
- Reconnect Accessories: Reattach the alternator, power steering pump, A/C compressor, and any other engine-driven accessories.
- Wiring Harness: Reconnect the wiring harness, sensors, and fuel injectors, ensuring all connections are correct.
- Fuel Lines and Exhaust: Reattach the fuel lines and exhaust system.
12. Refill Fluids
- Engine Oil, Coolant, Transmission Fluid: Refill the engine with fresh oil, coolant, and transmission fluid. Make sure to follow the manufacturer’s specifications.
13. Reconnect the Battery
- Electrical Power: Reconnect the negative terminal of the battery once everything else is in place.
14. Initial Startup and Testing
- Check for Leaks: Before starting the engine, check for any fuel, oil, or coolant leaks.
- First Start: Start the engine and let it idle to reach operating temperature. Pay attention to any unusual sounds or vibrations.
- Diagnostic Check: Scan the vehicle’s computer system for any error codes and troubleshoot as necessary.
15. Test Drive and Final Inspection
- Road Test: After a successful startup, take the vehicle for a test drive to ensure everything is functioning properly.
- Final Checks: After the drive, recheck fluid levels, engine mounts, and other components to ensure everything is secure and functioning correctly.
Key Considerations:
- Engine Tuning: If swapping for a different engine, ECU tuning may be necessary.
- Compatibility: Ensure the transmission, driveshaft, and differential are compatible with the new engine.


